Create a Web App on Flow
This guide is a simple walkthrough to get started building a web3 app using the Flow Client Library (FCL).
If you are looking for a scaffolds, check out scaffolds available in the Flow CLI.
This simple guide uses the "Hello World" scaffold, it is meant to provide all the code needed to get a web application up and running.
Introduction
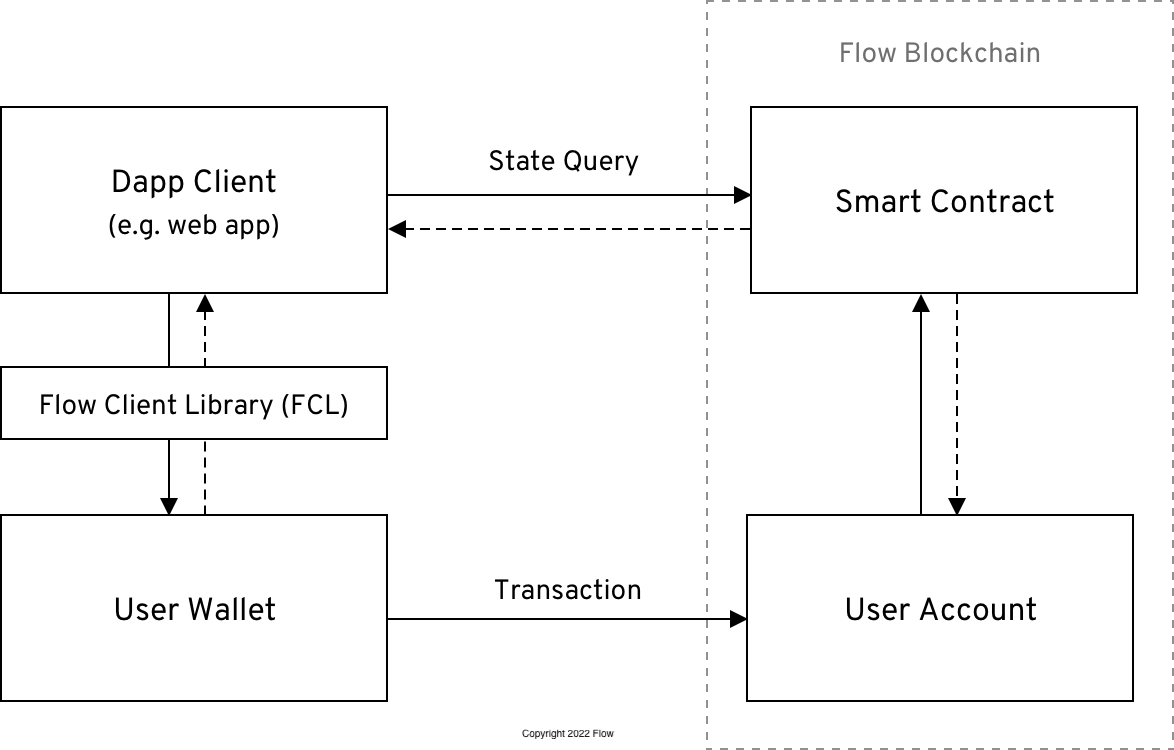
FCL (aka Flow Client Library) wraps the logic needed to communicate with the Flow blockchain. It's a npm package, More Information
This guide assumes a good understanding of React. The concepts are easy to understand and apply to other libraries and framework. A strong understanding of Cadence (Flow's smart contract language) is not required. More information on Cadence, learning the Cadence language.
FCL concepts covered:
- Installation
- Configuration
- Authenticate a user
- Deploy contracts
- Query the Blockchain
- Mutate the Blockchain
For more help, Discord. See links at the end of this article for diving deeper into building on Flow.
Installation
Make sure you have Flow CLI installed. installation instructions.
Configuration
Setting up Flow
Using the Flow CLI scaffold, create a basic hello world web project with Web Scaffolds -> [5] FCL Web Dapp. This will create a new flow.json file in the hello-world folder. This file will contain the Flow configuration for your project.
We don't recommend keeping private keys in your flow.json, notice that Flow CLI already moved the emulator private key to a emulator.key file and point to it using the key/location pattern. This file should be added to your .gitignore file, so it won't be committed to your repository.
We won't be using emulator and running contracts locally in this quickstart, but FCL will complain if it finds private keys in your flow.json file.
Your flow.json file should look like this:
The flow.json file is used to keep track of deployed contracts and accounts. More Information
Configuring FCL
Next, notice @onflow/fcl has been added to the package.json and the web application is ready to be run.
There are a lot of benefits to getting familiar with existing Flow CLI scaffolds. For example the hello-world scaffold already has fcl configuration settings to run on local emulator.
The hello-world web application comes with convenience npm commands to facilitate a quick start. The following command will preform:
- Start emulator
- Start dev wallet
- Start web app
Emulator is a local blockchain More Information. Emulator has all the features as testnet and mainnet blockchains
Now that your app is running. FCL loads the configuration in config/fcl.ts This file contains configuration information for FCL, such as what Access Node and wallet discovery endpoint and which network to use (e.g. testnet or a local emulator).
accessNode.apikey specifies the address of a Flow access node. There are publically available access nodes, but have to rate limit. Alternatively, applications might want to run an Observer node Run a Node.discovery.walletis an address that points to a service that lists FCL compatible wallets. Flow's FCL Discovery service is a service that FCL wallet providers can be added to, and be made 'discoverable' to any application that uses thediscovery.walletendpoint.
Also, notice that package.json uses NEXT_PUBLIC_FLOW_NETWORK=local for dev command, this is used to set the network in config/fcl.ts.
Learn more about configuring Discovery or setting configuration values.
The main Next.js app component is located in pages/_app.tsx. It should import the config file config/fcl.ts already and should look like this:
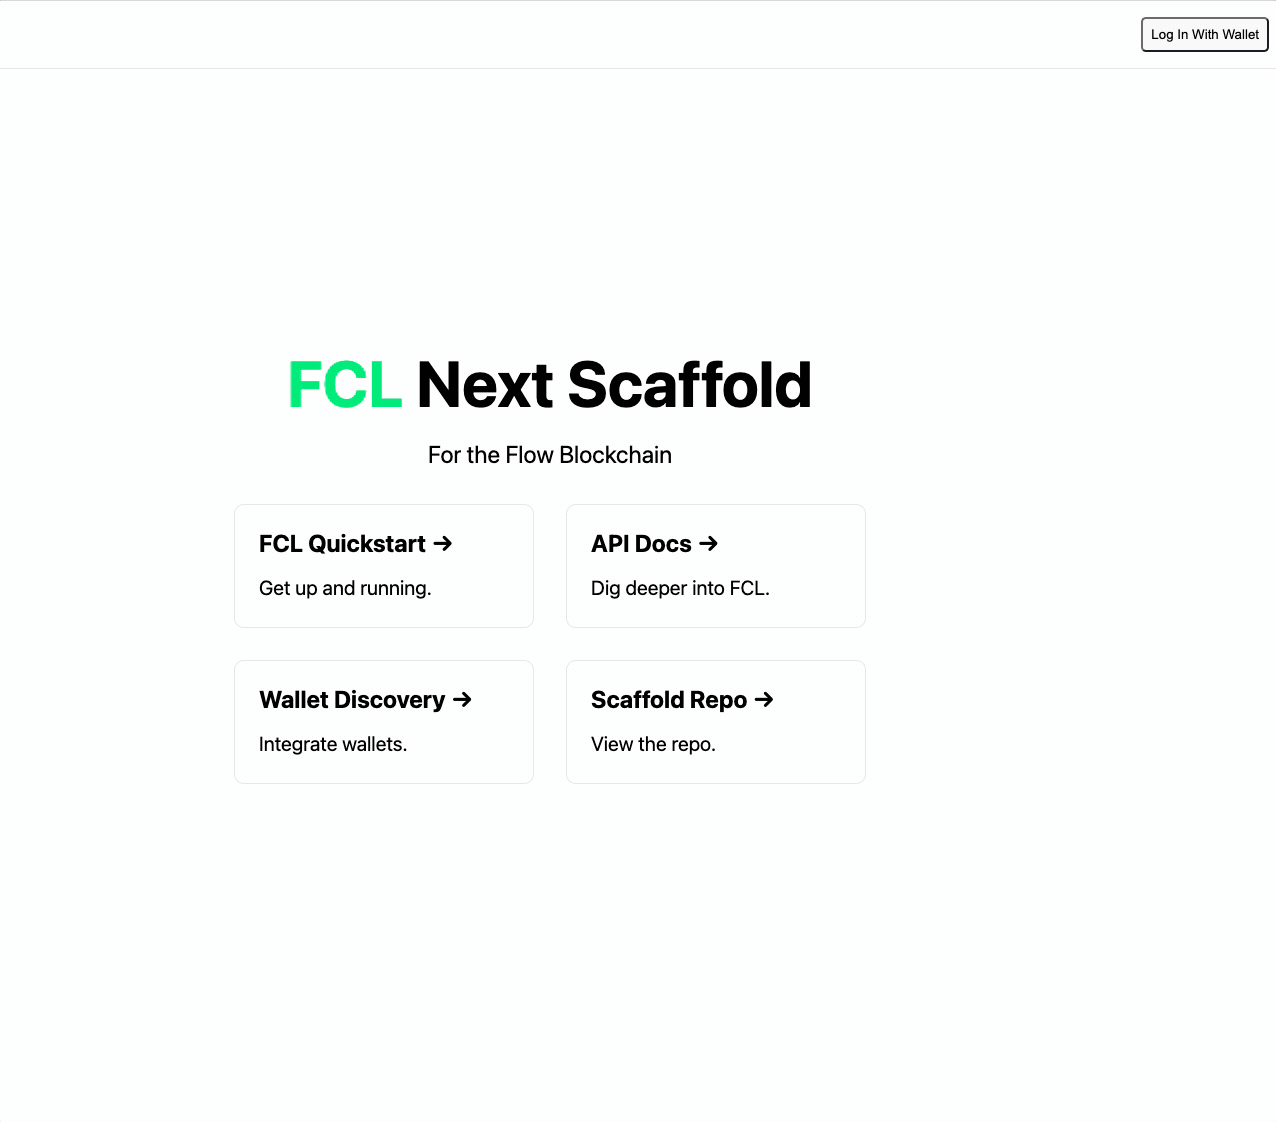
The main page for the Next.js app is located in pages/index.tsx. It should contain some basic UI and should look like this:
Now we're ready to start talking to Flow!
The web app will run, but there are no contracts deployed to local emulator. This is a step in Query the Blockchain section.
Authenticate a User
Navigate to localhost:3000 in your browser.
Note: in the code above useCurrentUser is used to determine if there is a logged in user.
There are two methods to allow the user to login. fcl.logIn() or fcl.authenticate() More Information on, authenticate
In components/Navbar.tsx a button wires up the authentication method fcl.authenticate(). It is used to bring up the list of supported wallets. See below
Once authenticated, FCL uses a hook const user = useCurrentUser() to get the user data, when user is signed in user.loggedIn flag is true. For more information on the currentUser, read more here.
You should now be able to log in or sign up users and unauthenticate them. Upon logging in or signing up your users will see a popup where they can choose between wallet providers. Choose the dev wallet to use the same account that deployed the HelloWorld contract, this is needed for mutation. Upon completing authentication, you'll see the component change and the user's wallet address appear on the screen if you've completed this properly.
More on wallets, Flow Core wallet is a Reference Flow wallet.
Deploy contracts
Hello World scaffold does come with a Cadence contract. You will notice HelloWorld.cdc has been deployed when running npm run dev:local. Look at hello-world package.json to see the commands that get run, flow dev deploys contracts to the emulator.
In the flow.json make sure the emulator endpoint is correct. Look at the terminal the emulator is running,
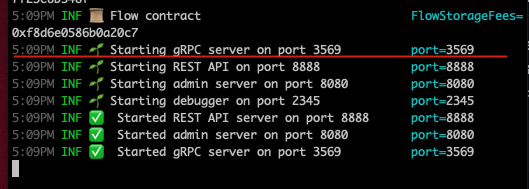
- Make sure the emulator is using the same port as
gRPCand - The
deploymentsection offlow.jsonshould look something like this:
Verify that flow.json updates with HelloWorld contract information, contracts has the HelloWorld contract and deployments shows that HelloWorld has been deployed.
For more information on deployments check Flow CLI documentation
Query the Blockchain
Now that all the pieces are in place, you can query the HelloWorld contract.
Navigate again to localhost:3000 in your browser.
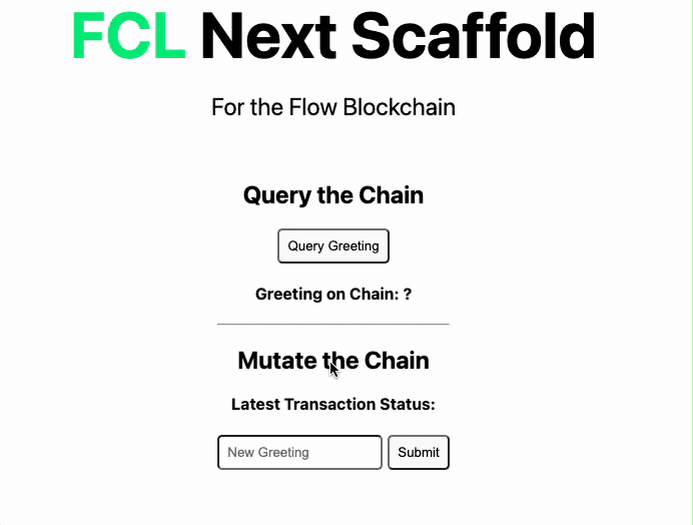
The script that queries the Hello World contract is located hello-world/cadence/scripts/ReadHelloWorld.cdc
In components/Container.tsx file, fcl.query is used to set the Cadence script and query the contract.
It is that simple!
Mutate the Blockchain
Update the HelloWorld contract greeting. Notice that Greeting gets changed when the transaction gets processed.
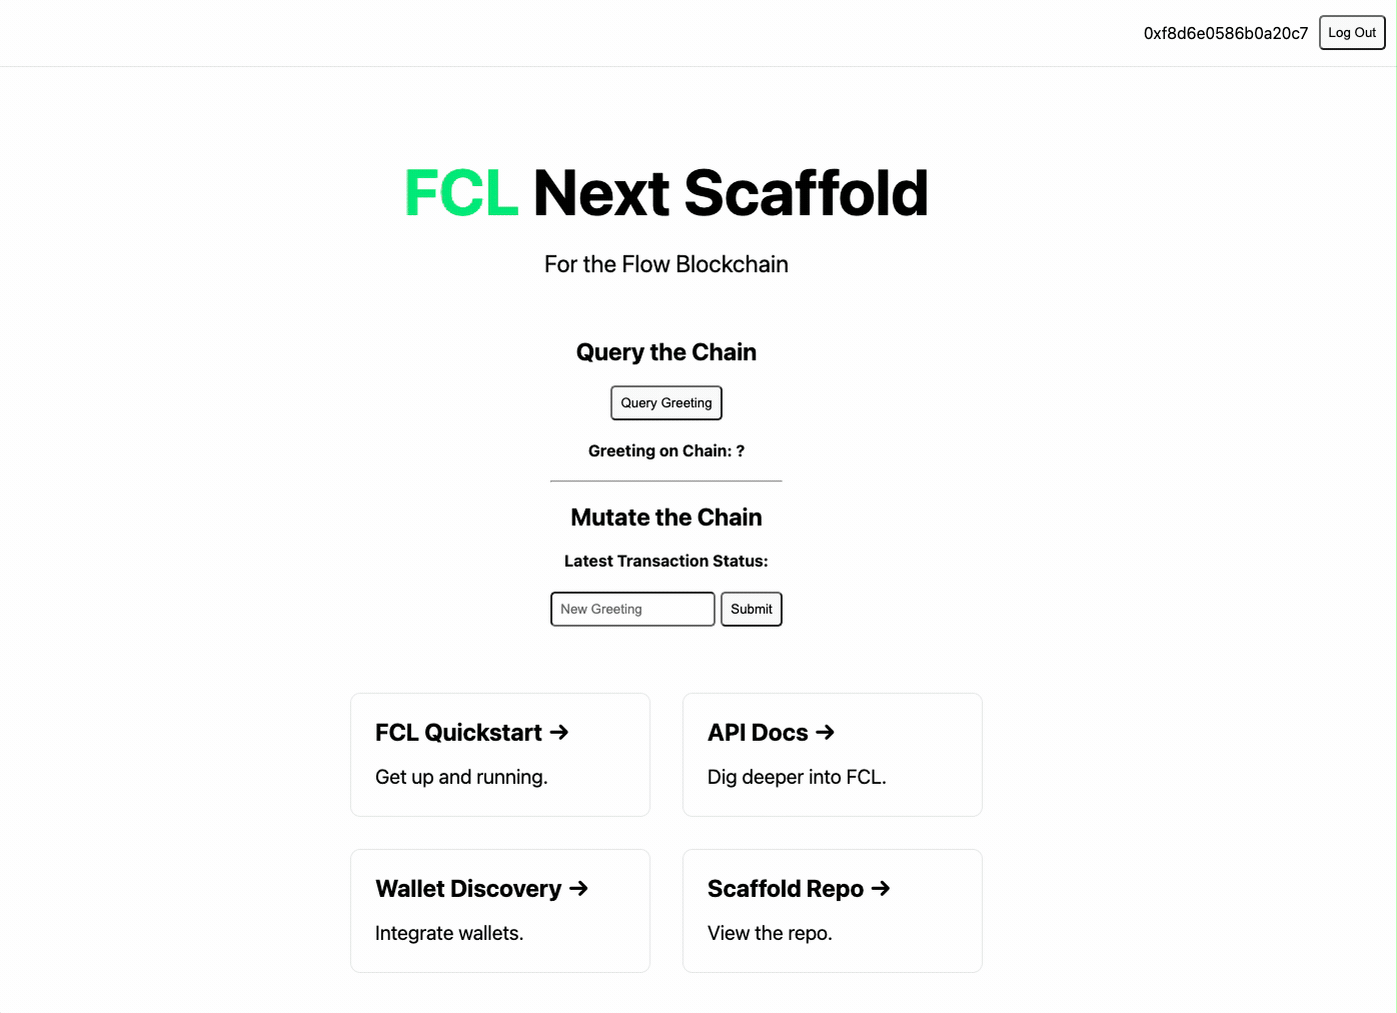
In components/Container.tsx file, the mutateGreeting method fcl.mutate sends UpdateHelloWorld cadence which triggers a transaction that the user signs.
More information
That's it! You now have Flow app that uses auth, query and mutate the chain. This is just the beginning. There is so much more to know. Next steps:
Cadence
FCL Scaffolds
Full Stack NFT Marketplace Example
More FCL